If you’re reading this article, then it must be that you know how amazing Emaze truly is. If you thought we were pretty impressive already, then wait until you learn these 12 emazing presentation hacks that will change your life.
Listen and learn:
1. 3D Rotation
Want to make your presentation come to life? Life is better in 3D!
You can make any text, shape or image 3D and literally pop-out of your screen.
2. Audio
Need a sound effect to go along with that cat? We can help you meow.
You can add an audio file (MP3, MP4 or YouTube video) from the menu bar (on top of your screen) to any text, an object or image. You can add audio as a soundtrack, effect or to play continuously throughout your presentation.
3. Scrolling slides
Looking for some more space? Let us help you consolidate!
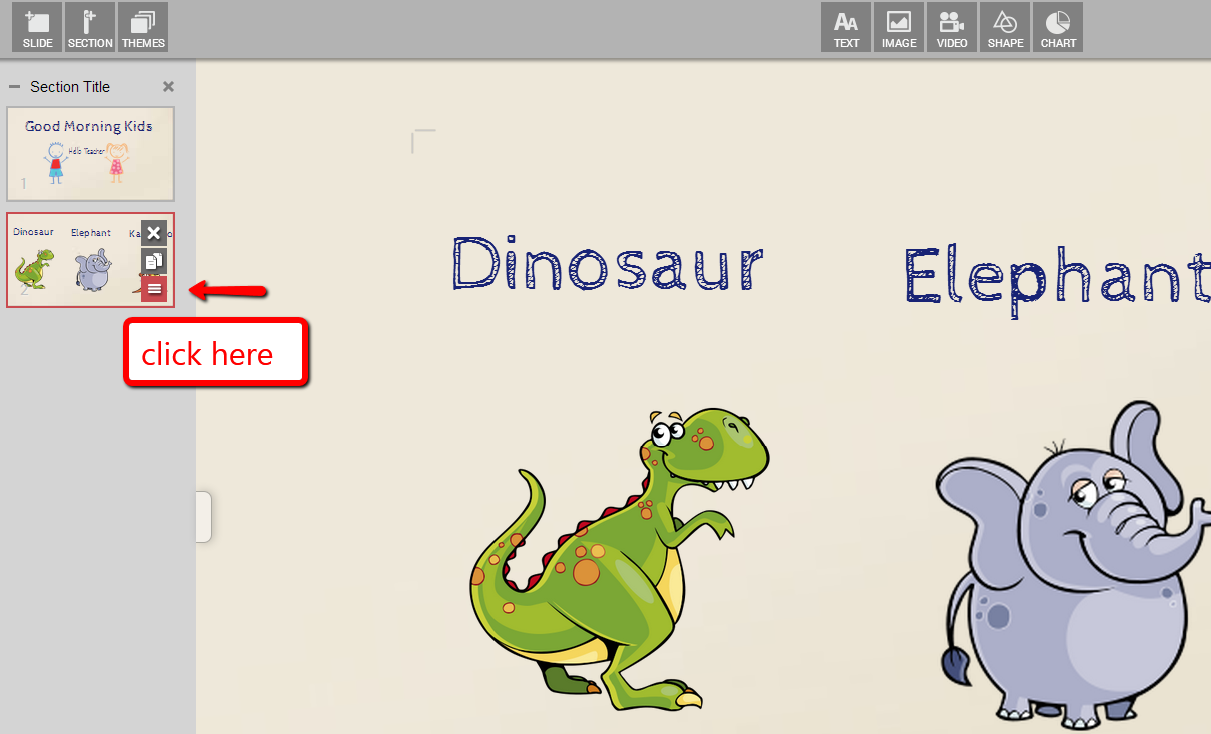
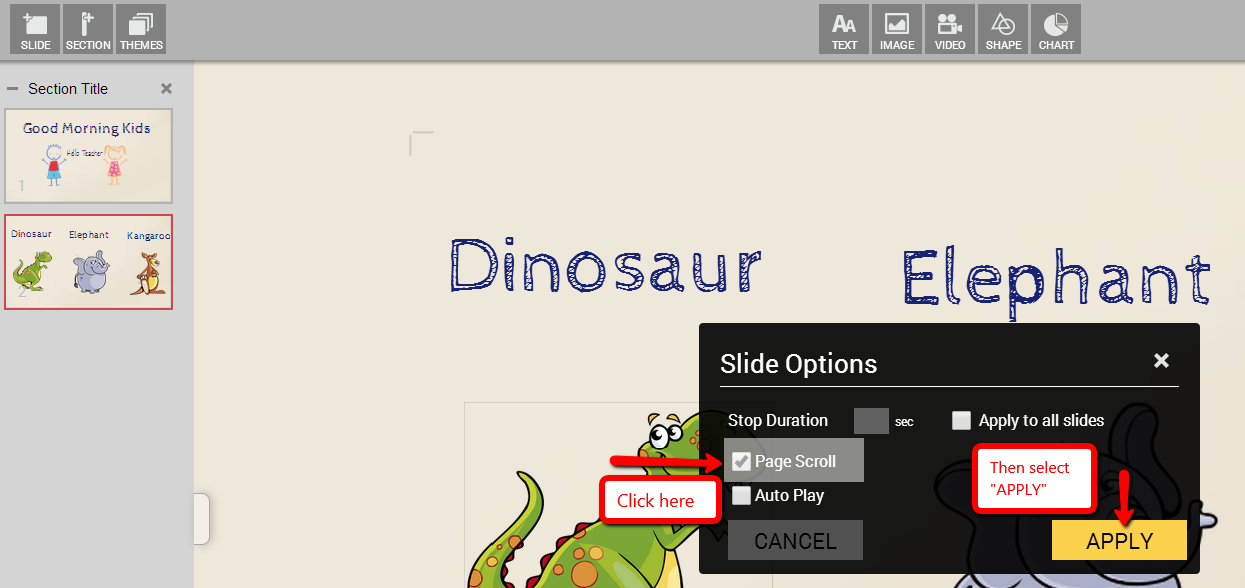
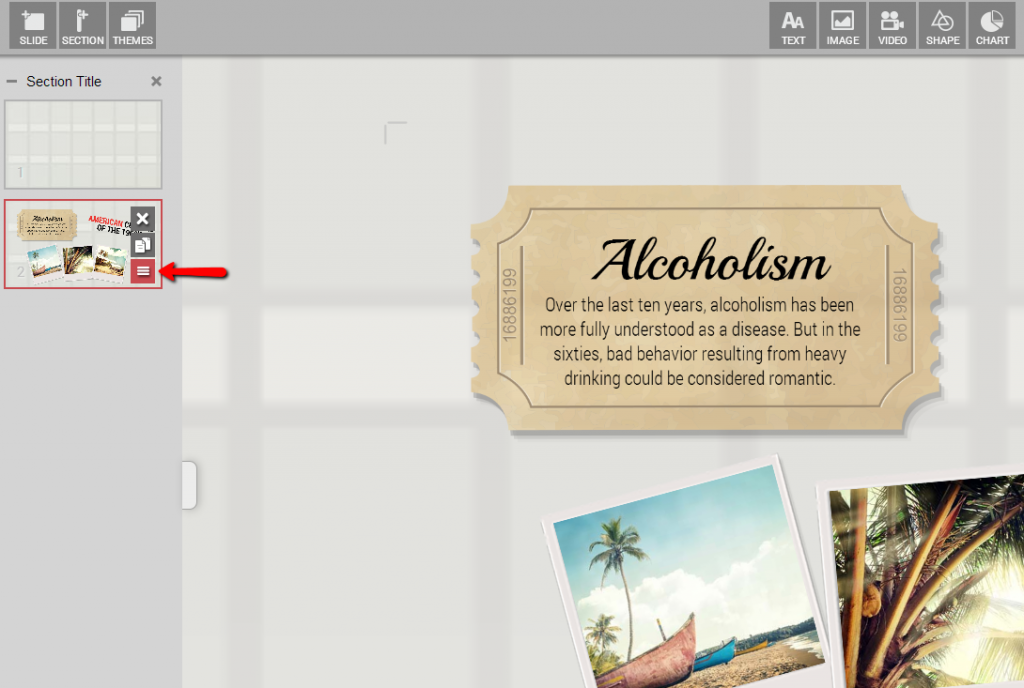
To add a “scrolling” to your slide, click on the slide you wish to apply this to from the left-hand side. Hoover your mouse over and click on the icon with the 3 lines, from there select “page scrolling.”
4. Dragging photos and video links
Need some more simplicity in your life? We’re there with you!
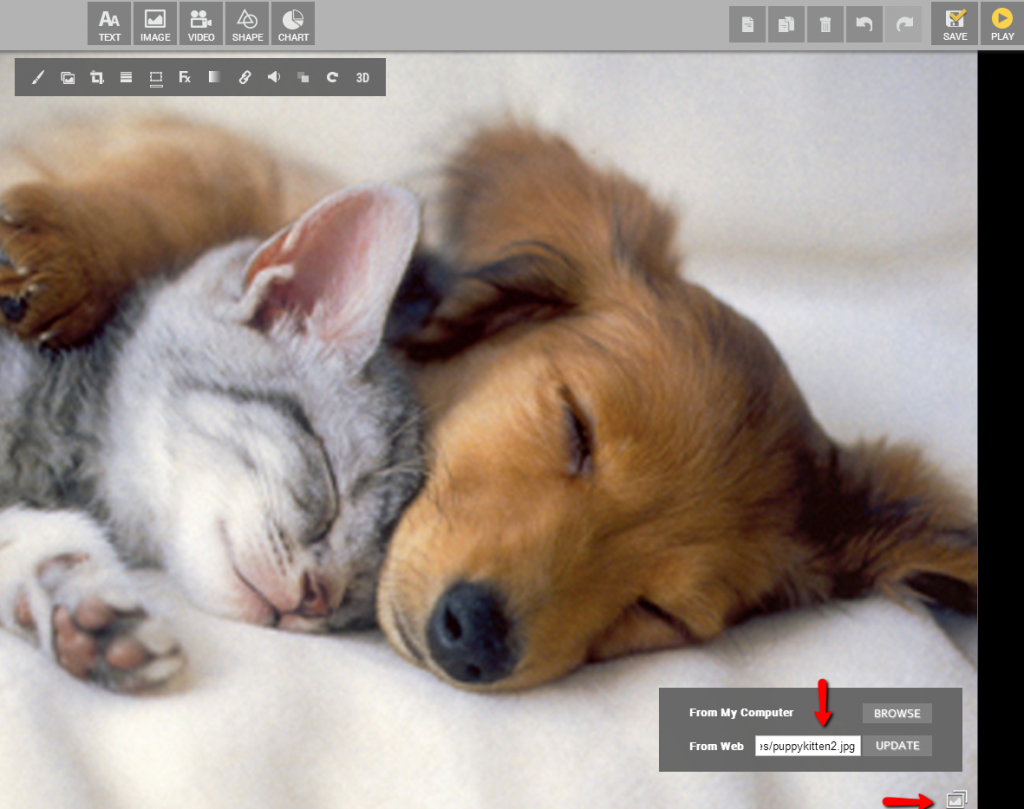
To drag photos into your presentation, copy and paste your desired image or drag it into your slide. For videos, you can copy the direct link to your slide and it will automatically convert it into an embedded video in your slide.
5. Save your presentation as a PDF
Do you want to save your presentation as a PDF? No problem!
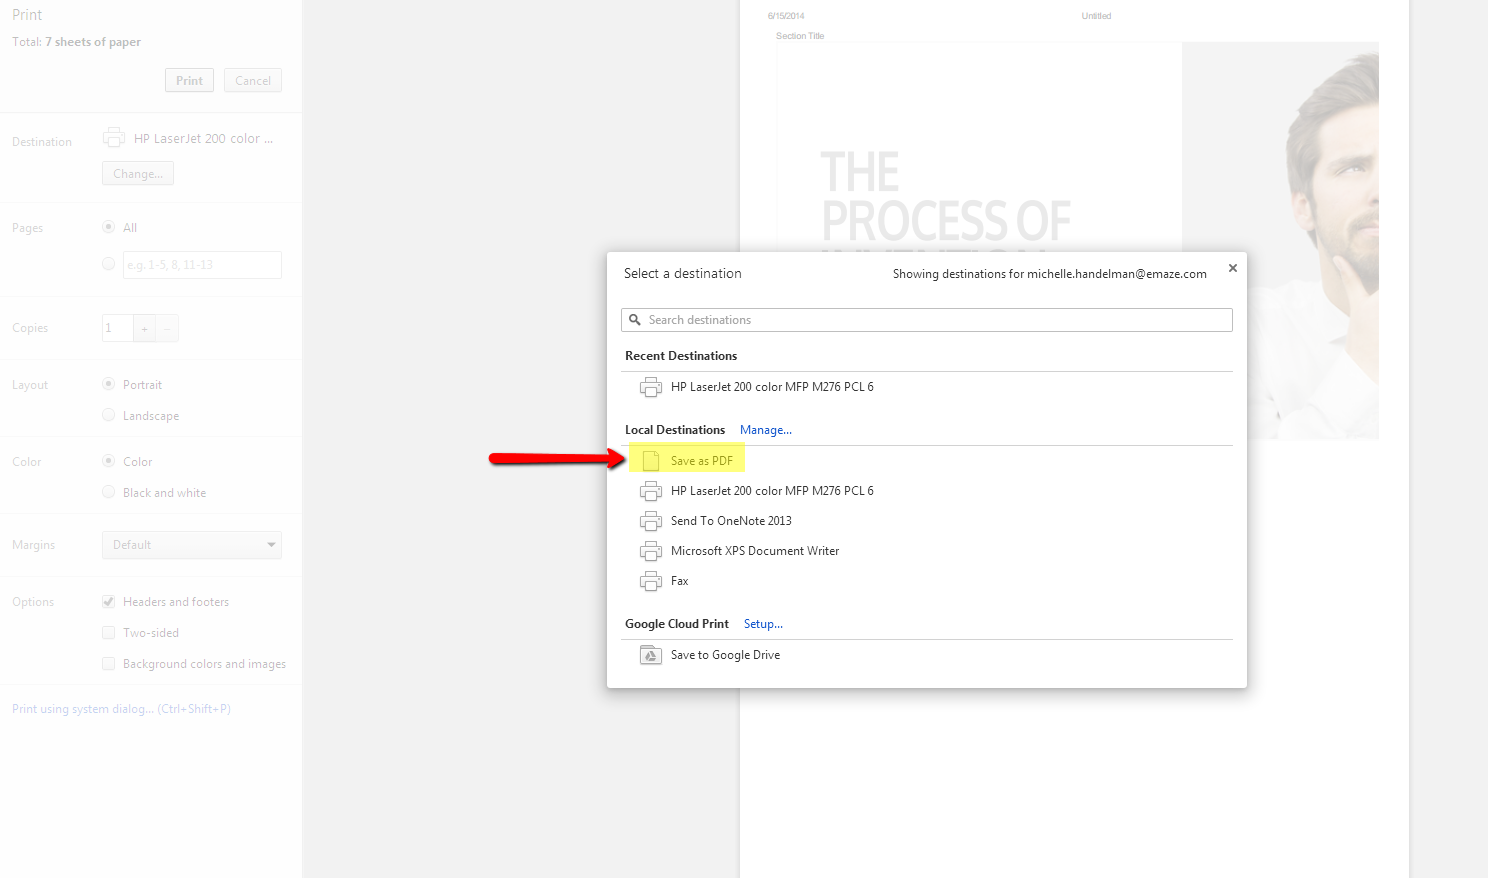
Click on the “print” button from the player side menu. In your printer options, select destination> save as PDF. *Note: for browsers other than Chrome, you will need to install a PDF printer driver.
6. Voice activated slide transitions
Need your hands free while you’re giving a presentation? We’ve got your back.
In player mode, you can play and move slides back and forth with the voice commands. Click the “voice” (microphone icon)control button on the player bar. *Note: Limited to Chrome.
[Note this feature is not available at the moment]
7. Viewing your presentation offline
Stuck somewhere without Internet? We can help you take your presentation with you.
Premium users have the ability to view and present presentations offline. Click on player side menu and select the “download option”. You can download your presentation into a ZIP file and it will be in HTML5 (zipped).
8. Sections
Need to be more organized? No problem.
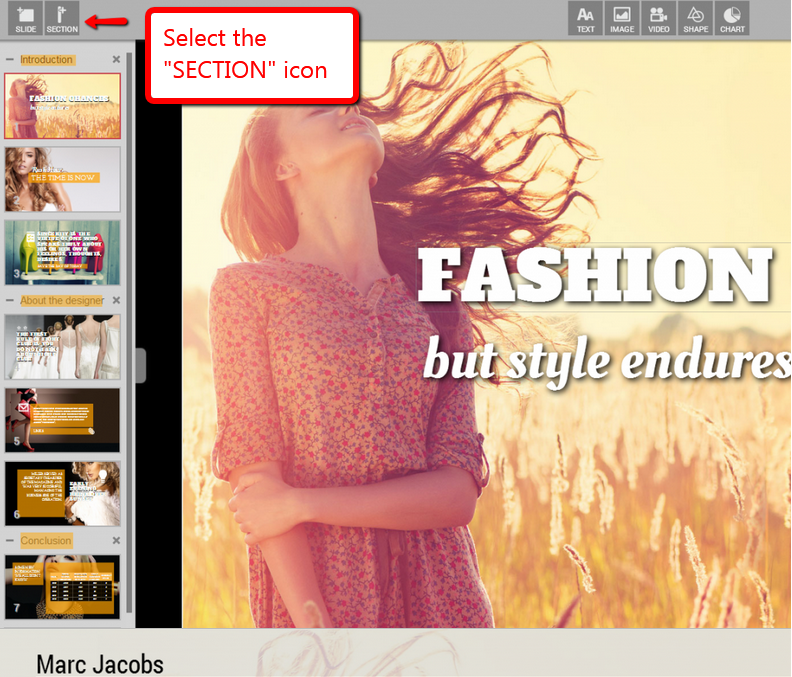
The “section” button enables you divide your slides into separate sections for organizational purposes. You can see the sections while playing on the “Agenda” and jump to any section in a click.
9. Viewing all slides at once
Want to see all your slides in one view? Easy.
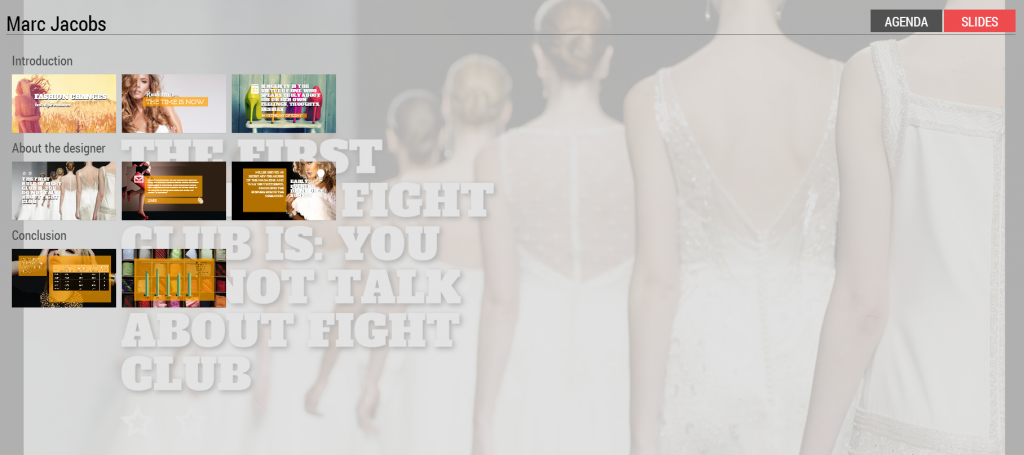
In player mode, on the player control bar (on the bottom center of the screen) click on the “agenda icon” (second from the right). This will give you the list of sections for this Presentation. Choose the slides options (top right of screen) and you will view all the slides in this presentation.

10. Timed slide transitions
Do you love drama? Check out this cool effect.
Set the duration (in seconds) of each slide in play mode, the player will show a specific slide before displaying the next slide. You can set a different “duration” time for each slide or you can set a “global” (same) time for all the slides in the presentations in the slide list) and click on the player menu.
11. Change background image to your own
Want to make your presentation more “you”? We’ll help you customize it.
You can change the background image in the following templates: Wake up and smell the coffee, Fashion, Patterns, Travel. Click on the “photo” icon on the bottom left-hand corner of your slide to replace our image with your own.

